
Views: 0 Author: Site Editor Publish Time: 2026-11-18 Origin: Site


Manhole step replacement in existing chambers means taking out worn-out steps and putting in new ones without rebuilding the chamber structure. You keep the original precast or cast-in-place walls and bring back safe access for confined-space work. This matters for two reasons: worker safety during entry and exit, and the service life of the asset itself.
This guide walks you through chamber assessment, step selection, installation scenarios for each anchorage type, and the mistakes that weaken a retrofit. You will learn how to plan the work before anyone opens the cover.
First, inspect the chamber to find the anchorage type and any damage.
Choose replacement steps that fit the existing anchorage and the chamber's surroundings.
Follow the right installation steps for each type of anchorage to keep things safe.
Avoid common mistakes, like using the wrong anchors and poor surface prep, to keep steps from coming loose.
A retrofit that meets the rules saves money over time by cutting down on repairs and callouts.
Steps give workers a safe path into and out of a confined space. That path must hold under load, stay lined up, and resist slipping. A broken step turns a normal inspection into a fall hazard inside a narrow shaft. Rescue from that spot is slow and hard.
Precast concrete manhole installations require steps, and standard polypropylene steps are the usual choice. These steps must hold a person safely at every rung, from the top step down to the invert. Treat every step as life-safety equipment, not as a nice extra.
Check each step for corrosion, cracking, looseness, missing steps, and worn treads. Corrosion attacks metal anchors and embedded hardware first. Cracking often starts where the step meets the wall, since stress builds up there. A loose step moves under hand pressure or rocks when you put weight on it.
Worn treads lose their grip surface, and a missing step breaks the climbing rhythm. Any one of these signs is reason enough to replace the step. Several signs together mean you should plan the retrofit now. Record each defect by location and severity during your inspection walk. This record guides step selection and helps you order the work. It also gives you a baseline for comparing condition on future inspections.
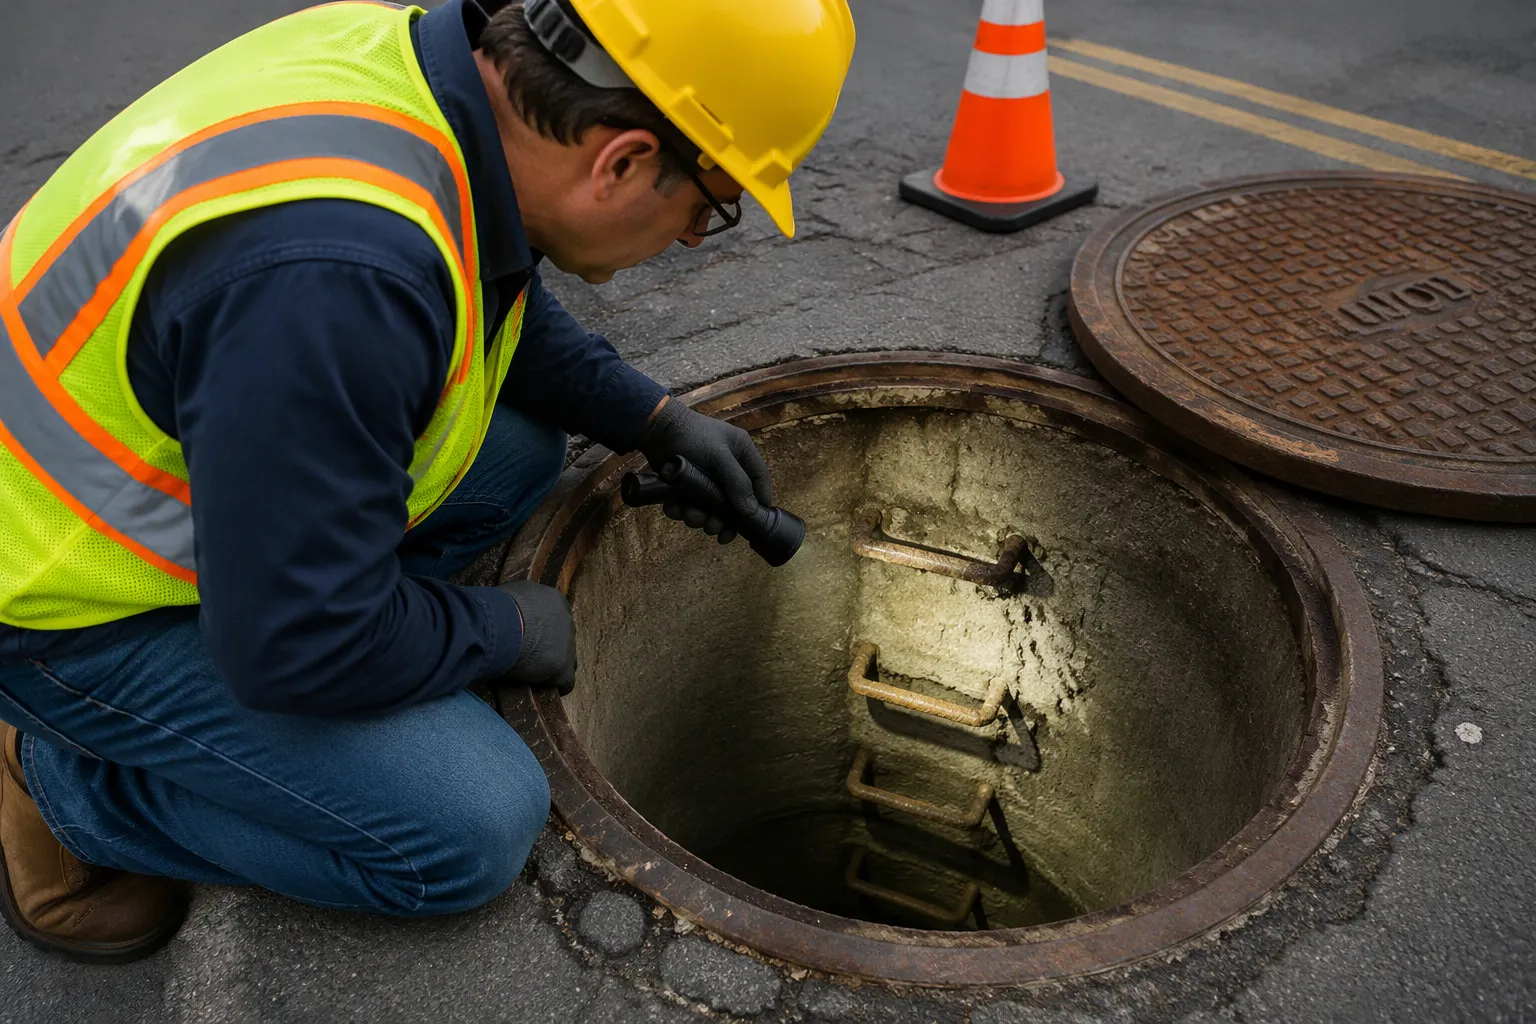
Begin your assessment at the top step and work your way down. Find out the anchorage type first, since it decides your whole replacement procedure. You will see one of three systems: cast-in steps set during precast production, dowel sleeve systems with factory-installed inserts, or pre-drilled holes added after installation. Each type needs a different removal and reinstallation approach.
Check the wall condition around every step. Look for spalling, cracking, and exposed aggregate at the anchorage points. A step that pulls loose often takes a chunk of wall with it. That damage changes your anchor choice and may need patching before you install anything new.
Next, assess the corrosion environment. Chambers in coastal areas, near deicing salt routes, or in high-water-table soils attack metal hardware faster. Note any hydrogen sulfide or other aggressive agents in sanitary sewers. This information guides your material choice for the replacement steps.
Reference the applicable rehabilitation performance specifications for your jurisdiction. These documents set minimum requirements for repair, replacement, and rehabilitation of manhole steps and related components. They define acceptable materials, load ratings, and installation tolerances. Pull the current version before you finalize your plan.
Verify the top step elevation against the standard. The top manhole step should sit no more than 34 inches and no less than 20 inches below finish street grade. A step outside this range forces an awkward first reach from the surface. Correct the elevation during the retrofit if the existing top step falls outside the band.
Map the physical constraints around the chamber before you order materials. Measure the clear opening diameter and the vertical distance from the frame to the invert. Confirm that your replacement steps fit the available wall space without interfering with the ladder path or the cover swing.
Check traffic control requirements for the work zone. A retrofit in a live roadway needs lane closures, signage, and a safe pedestrian route. Plan the work window around traffic volume. Off-peak scheduling reduces disruption and gives your crew more working time.
Evaluate access for tools and materials. Confined-space entry rules apply to the chamber itself. Your crew needs a gas monitor, a tripod or winch, and a spotter at the surface. Confirm that the site has room for this equipment without blocking traffic or drainage.
Review the chamber's structural condition as a whole. A chamber with significant wall deterioration may need lining or repair before step installation. When a lining is planned, existing steps should be neatly cut flush with the wall prior to lining installation. Sequence the work so that lining, patching, and step replacement follow a logical order.
Document every constraint in your plan. Photograph the chamber interior, record measurements, and note the anchorage type at each step location. This record supports material ordering, crew briefing, and future inspections.
Match each new step to three things: material, how it attaches, and the chamber's surroundings. Start with how it attaches. A cast-in step needs a direct swap with the same shape. A dowel sleeve system takes a step with a matching insert. A pre-drilled hole takes an expansion or adhesive anchor. Pick the step that fits the anchorage you already have, and you skip needless wall work.
Then compare the material to the surroundings. Polypropylene steps work for most sanitary and storm chambers. They stand up to normal sewer chemistry and stay light for the installer. Composite steps add stiffness and hold up well in harsh air. Metal steps give high strength where the design calls for it. Each option has a place; the chamber decides which one.
Factor |
What to check |
|---|---|
Material |
Chemistry of the chamber, expected service life |
Anchorage |
Cast-in, dowel sleeve, or pre-drilled hole |
Environment |
Moisture, salt exposure, sewer gases |
Plan the order when a lining is part of the retrofit. Existing steps should be neatly cut flush with the wall before lining installation. A flush cut gives the lining a clean surface to bond against. Install the new steps after the lining cures, using the anchorage method the lined wall allows.
Compliant steps meet the load and material rules in your rehabilitation specification. Confirm the load rating, the step spacing, and the top step elevation before you order. Check that the step profile matches the wall thickness and the clear opening. A step that meets the standard but fits poorly still creates a hazard.
Chamber parts work as a system, and the cover, frame, and steps should come from suppliers who understand that system. Elite New Materials is an SMC composite manufacturer with more than 20 years in building materials. The company makes composite molded manhole covers and custom composite solutions for infrastructure chambers. Treat step selection and cover selection as one planning task, and the finished chamber performs as a unit.
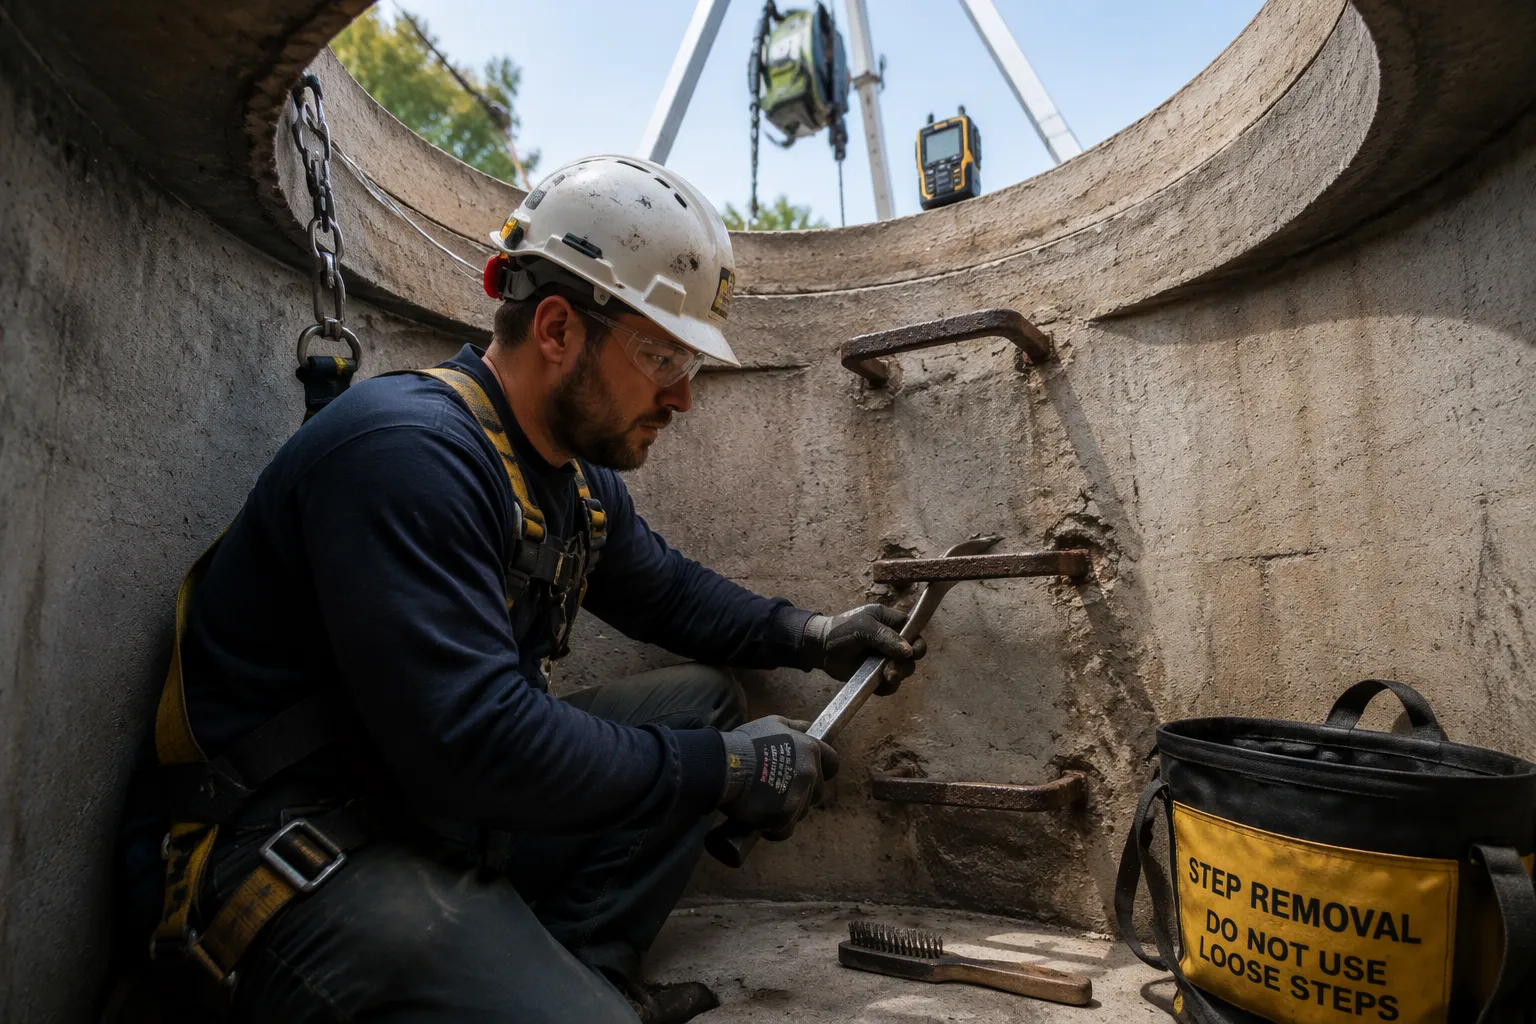
A loose step is the most common trigger for manhole step replacement. The step rocks under hand pressure, or it pulls free with little effort. Treat that movement as a warning. The anchor has already lost grip, and the next worker to trust that rung may fall.
Work from the surface down, and remove the top step last so the crew keeps a climbing path as long as possible. Follow this sequence:
Set up confined-space controls before anyone enters. Place the gas monitor, the tripod or winch, and the surface spotter first.
Test the step by hand. Push, pull, and twist it to judge how much anchorage remains.
Cut or unbolt the step at the wall. On a cast-in step, cut the embedded legs flush with the concrete surface.
Pry the step free without levering against the wall. A pry bar braced on the concrete chips the surrounding surface.
Clean the opening. Remove loose concrete, rust scale, and debris with a wire brush.
Probe the hole depth and width. Confirm the cavity is sound and free of voids.
Patch spalled or cracked concrete around the opening. Let the patch cure to the manufacturer's specification before you load it.
Handle a corroded step with care. Corrosion thins the embedded metal, and a rusted leg may snap during removal. Support the step as you cut it so it does not drop into the chamber. Bag every removed step and take it out of the shaft. Never leave debris on the invert.
Verify the anchorage before you install anything new. Check that the remaining sleeve, hole, or embedment is sound and correctly sized. A loose step often signals a wider wall problem. Inspect the surrounding concrete for cracks that radiate from the opening. Repair that damage first. A new step set into a damaged wall will loosen again.
Match the new step to the opening you have. Use the same anchorage type the chamber was built with whenever the existing hardware is sound. Set the step into the prepared opening and seat it fully. Do not force a step that binds; a forced fit cracks the surrounding concrete.
Check alignment against the steps above and below. The rungs should line up in a straight vertical path. Confirm the top step elevation against the 20-to-34-inch band below finish grade. Tighten or set the anchor per the step manufacturer's instructions. Then load-test the step before you sign off the work. A firm downward pull with body weight confirms the anchor holds. Record the test result and the step location in your inspection log.
Dowel sleeve systems give you a factory-installed insert in the precast wall. The sleeve holds the step leg, and the step slides in or threads into place. Inspect every sleeve before you decide to reuse it. Clean the sleeve bore with a wire brush and flush out grit, rust, and old sealant. Shine a light inside and check the threads or the grip surface.
Reuse a sleeve when the bore is sound, the threads are intact, and the sleeve stays fixed in the concrete. Test the sleeve by hand. A sleeve that spins or pulls outward has lost its bond. Reuse also depends on size. Confirm the new step leg matches the existing sleeve diameter and thread pattern.
Replace the sleeve when you find cracks in the surrounding concrete, stripped threads, or a loose insert. A sleeve with heavy corrosion inside the bore will not hold a new step reliably. Match the replacement sleeve to the original embedment depth. A shallow sleeve gives the step less grip.
Removing a failed sleeve takes care. Cut or drill out the old insert without widening the hole beyond the new sleeve's outer diameter. Clean the cavity and remove all loose material. Set the new sleeve to the correct depth and alignment. Keep the sleeve square to the wall so the step sits level.
Choose the repair method by damage extent. A small, sound hole takes an adhesive-set sleeve. A larger or spalled cavity needs patching first, then a new sleeve set into the cured repair. Let the patch reach full cure before you load the sleeve.
Verify the finished assembly before you move to the next step. Slide the step into the sleeve and check the fit. Pull downward with body weight and watch for movement. Confirm the rung lines up with the steps above and below. Record the sleeve location and test result in your log.
Pre-drilled holes give you the most freedom in an existing chamber. You set the hole location, so you control step spacing and alignment. Mark each hole position against the steps above and below. Keep the rungs in one straight vertical line. Confirm the top step sits within the 20-to-34-inch band below finish grade before you drill.
Follow this sequence at each location:
Mark the hole center with a punch or marker.
Drill perpendicular to the wall at the specified diameter and depth.
Blow out dust and debris with a brush and compressed air.
Probe the hole to confirm depth and a sound cavity.
Choose the anchor by wall condition and load requirement. An expansion anchor suits sound concrete with a clean bore. An adhesive anchor fits cracked or uneven walls, since the resin fills voids. Match the anchor diameter to the step leg and the drill bit. A loose fit in an oversized hole weakens the grip.
Set the anchor per the manufacturer's instructions. Seat expansion anchors with the specified torque. Inject adhesive anchors and insert the step before the resin sets. Hold the step steady until the cure time passes. Do not load the step early; a premature pull breaks the bond.
Verify each step before you move down the shaft. Pull downward with body weight and watch for movement at the wall. Check the rung against a level and against the steps above and below. Confirm the step does not rock or spin. Record the location and test result in your inspection log. A failed check means you remove the anchor, clean the hole, and start again.
Most retrofit failures trace back to a handful of repeatable errors. Watch for these on every chamber:
Wrong anchor type. An expansion anchor in a cracked wall will not hold. Match the anchor to the wall condition, not to what the truck carries.
Insufficient embedment. A shallow hole gives the step less grip. Drill to the specified depth and probe the hole before you set anything.
Misaligned spacing. Rungs that drift out of line break the climbing rhythm. Check each step against the one above and below.
Skipped surface prep. Dust, rust scale, and loose concrete defeat adhesive and mechanical anchors alike. Clean and probe every opening.
Each error looks small at the moment of installation. Each one shows up later as a loose step under a worker's boot. Build a check into your sequence at every location, and the errors stop before they start.
Confined-space entry is the biggest oversight in retrofit work. Crews treat a short step swap as a quick job and skip the controls. Set up the gas monitor, the tripod or winch, and the surface spotter before anyone opens the cover. Keep the attendant at the surface for the whole entry. Never let a worker descend alone, even for a single step.
Plan the removal order to protect the climbing path. Remove the top step last, so the crew keeps a route out of the shaft. Bag every removed step and lift it out; debris on the invert becomes a trip hazard. Test each new step with body weight before you sign off the location. Record the test result in your inspection log. A retrofit that skips these checks trades a planned repair for a rescue call.
A compliant step system lowers your upkeep work starting with the first inspection cycle. Steps that meet the rehabilitation specification have the right load rating and the right anchorage for the wall. That match keeps each rung steady under daily use. You stop dealing with loose steps between scheduled inspections.
The material you pick decides how long the steps last. Polypropylene and composite steps resist sewer chemicals and stay stable in wet chambers. They do not rust, so the anchor stays strong and the step keeps its grip. A step that holds up well means you do not need to replace it early. Your crew can spend its time on other assets instead.
Compliant steps also protect the chamber wall. The right embedment depth and the right anchor type spread the load the way the specification intends. The concrete around each opening stays whole. You avoid the spalling and patching cycle that comes from a poorly anchored step. Fewer wall repairs mean a longer service life for the whole structure.
Safety and cost go hand in hand on this work. A firm, lined-up rung gives every worker a dependable path into and out of the chamber. That dependability lowers the risk of a fall inside a narrow shaft, where rescue is slow and hard. You protect your crew and the asset at the same time.
The cost case grows over the asset lifecycle. A compliant retrofit costs more up front than a quick swap with whatever anchor is on the truck. That extra cost pays back through fewer return visits, fewer emergency callouts, and fewer wall repairs. Each callout you avoid saves a crew, a traffic setup, and a confined-space entry.
Treat the retrofit as a planned investment. You assess the chamber, choose the right system, and install it to the specification. The chamber then gives safe access for years with routine inspection alone. That result helps both your safety record and your maintenance budget.
Make a clear plan and follow it step by step. Check the chamber first, then pick the step system that matches the wall and the surroundings. Use the right method for the type of anchorage you find, whether cast-in, dowel sleeve, or pre-drilled. Watch for the common installation and safety mistakes at every step.
Keep two things in mind: worker safety and saving money. A strong, straight rung keeps your crew safe, and a compliant system means fewer return trips and fewer wall repairs. Treat manhole step replacement as a planned upgrade, not a quick fix. That way you get safe access for years with only routine inspection.
No. You keep the existing precast or cast-in-place walls and swap only the steps. The work stays a retrofit. You remove the failed step, prepare the anchorage, and install the new step into the same wall. Chamber reconstruction only enters the plan when the wall itself has failed.
Duration depends on step count, anchorage type, and cure times for patching and adhesive. A single loose step takes far less time than a full ladder replacement. Plan the work window around traffic control and confined-space entry rules. Do not compress cure times to finish early.
Yes, with the right sequence. Cut existing steps neatly flush with the wall before lining installation. The lining then bonds to a clean surface. Install the new steps after the lining cures, using the anchorage method the lined wall allows.
Probe the opening and inspect the hardware directly. A cast-in step leaves embedded legs in the concrete. A dowel sleeve shows a factory insert in the wall. A pre-drilled hole shows a drilled cavity with an anchor. Match your replacement method to what you find.
Replace steps that show corrosion, cracking, looseness, or worn treads. A chamber with several failed steps usually justifies a full set. One isolated defect can wait for a single swap. Either way, verify the top step sits within the 20-to-34-inch band below finish grade.


